
Catching Aniimo: which Aniipod to throw
Start with a basic Aniipod. Spend a better pod only when you can name the problem: low odds, a long throw, a moving target, a Wild Surge, or a catch you cannot lose.
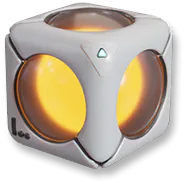
Throw the cheapest Aniipod that fixes the reason this catch might fail.
Read the encounter first
When the target appears, do not start by cycling to the rarest item. Make the attempt cheaper first: approach without alerting it when the route allows, create a BREAK opening when you are fighting — see Combat: BREAK and EP — then read the chance the game presents. Only after that do you decide whether the miss is about odds or about landing the throw.
- 1
Prepare the target
An unaware approach or a BREAK opening increases the value of the attempt before an item leaves your hand.
- 2
Separate odds from aim
A low percentage calls for a catch multiplier. A distant or erratic target calls for a delivery assist.
- 3
Spend the smallest answer
Stay on Aniipod for routine work; step up only when the visible problem has not been solved.
- 4
Reset after a special throw
Move off a guarantee immediately. The next ordinary target should not inherit an expensive selection.

What each Aniipod is for
Each model belongs to a different kind of catch. A higher tier only matters when its extra effect solves the obstacle in front of you.
Aniipod
This is the workhorse. If the target is easy to reach and the shown chance is fine, throw it and keep moving.
→
Aniipod Pro
Use the small bump when one ordinary throw feels needlessly risky, not because the pod is rarer.
→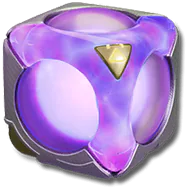
Aniipod Mega
Choose Mega when aim is already solved and the percentage is the only thing holding the catch back.
→
Aniipod Hyper
This is the reach tool. Spend it when a normal toss cannot comfortably touch the target.
→
Aniipod Trace
This is for a target that turns or runs after release; do not waste it on something standing still.
→
Tumbler
It becomes exceptional only in a gathered Wild Surge, where one rolling catch can work through the group.
Carry ten free Aniimo slots before using it.→
Aniipod Ultra
Use it when the individual target matters enough that a miss would end the session badly.
Its current configuration also sets an Elite-or-better Acquired Potential floor.→
Sparkling Cube
Reserve it for the one species or form you are sure you want to keep as a Sparkling.
Launch notes confirm the catch also has Perfect Potential.→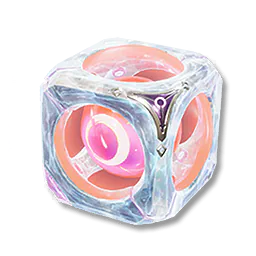
Legendary Aniipod
Craft it for Irisalis after collecting Legendary Tokens; it is a story-catch key, not a field pod.
→The quick read: ordinary catches begin with Aniipod; Pro is the modest bump; Mega, Hyper, and Trace share 2× odds but solve three different throw situations.
Mega, Hyper, and Trace
Aniipod Mega
2× catch rateChoose Mega when aim is already solved and the percentage is the only thing holding the catch back.
Use it when this is the actual failure.Aniipod Hyper
2× + faster, longer throwThis is the reach tool. Spend it when a normal toss cannot comfortably touch the target.
Use it when this is the actual failure.Aniipod Trace
2× + trackingThis is for a target that turns or runs after release; do not waste it on something standing still.
Use it when this is the actual failure.Easy target, low chance? Mega. Target is outside your throw? Hyper. Target changes direction mid-release? Trace. A delivery assist is not an excuse to spend one when the target is standing still.
When to throw a Tumbler
In a regular field catch, Tumbler is another 2× option. Its value appears when the Nurture loop gathers a Wild Surge: its group-catch effect reaches 6×. That is a different job from Mega, even though both can look like a plain multiplier in the item list.
Use the ordinary 2× choice for an ordinary target. Keep Tumbler in reserve until the encounter lets it roll through the group it was designed for.
Open the Tumbler record →How to catch Irisalis
The launch version changed the Irisalis loop so players are not expected to replay the same challenge and throw indefinitely. Collect Legendary Tokens while exploring and progressing through the story, craft a Legendary Aniipod, then open Irisalis's dedicated encounter from the map.
That changes the prep completely. Bring the finished item to the one encounter, clear the battle, follow the story sequence, and use the crafted pod to seal the bond. Do not put Legendary Aniipod in the same mental category as Pro, Mega, or Trace—it is a key for a named objective.
When to spend a guaranteed catch
Save Ultra and Sparkling Cube for a catch you have already decided matters. The question is whether this exact Aniimo, form, or Sparkling is worth consuming the item.
LegendaryAniipod Ultra
Guaranteed catchUse it when the individual target matters enough that a miss would end the session badly.
Its current configuration also sets an Elite-or-better Acquired Potential floor.PrismaticSparkling Cube
Guaranteed Sparkling catchReserve it for the one species or form you are sure you want to keep as a Sparkling.
Launch notes confirm the catch also has Perfect Potential.How to restock Aniipods
Item rarity does not tell you how painful a replacement will be. The table below separates ordinary catch stock from niche tools and one-off insurance, so a long hunt does not quietly drain the part of your pouch you meant to protect.
| Pod | Where it returns to your pouch | Listed shop / exchange cost | Field rule |
|---|---|---|---|
| Aniipod | Credit Shop, quests, Adventure Token shops, Homeland production, and Adventure Rank chests | 200 Credits | This is the workhorse. If the target is easy to reach and the shown chance is fine, throw it and keep moving. |
| Aniipod Pro | Elite Training, quests, Adventure Token shops, Homeland production, and chests | 800 Credits or 2 Aniipods at Lumen | Use the small bump when one ordinary throw feels needlessly risky, not because the pod is rarer. |
| Aniipod Mega | Elite Training, quests, Adventure Token shops, Homeland production, limited events, and chests | 60 Training Points or 2 Aniipod Pros at Lumen | Choose Mega when aim is already solved and the percentage is the only thing holding the catch back. |
| Aniipod Hyper | Companion Handbook, Adventure Token shops, and the regular shop | 2,500 Credits | This is the reach tool. Spend it when a normal toss cannot comfortably touch the target. |
| Aniipod Trace | Companion Handbook, Adventure Token shops, and the regular shop | 5,000 Credits | This is for a target that turns or runs after release; do not waste it on something standing still. |
| Tumbler | Elite Training, Glimmer Purchase, Nurture Branch, Adventure Token shops, quests, and chests | 5,000 Credits | Carry ten free Aniimo slots before using it. |
| Aniipod Ultra | Elite Training, Glimmer Purchase, shops, item exchanges, and chests | 20 Aniipod Ultra Vouchers at Lumen | Its current configuration also sets an Elite-or-better Acquired Potential floor. |
| Sparkling Cube | Elite Training, Fun Stamp Collection Shop, Companion Handbook, shops, and item exchanges | 100 Sparkling Crystals at Lumen | Launch notes confirm the catch also has Perfect Potential. |
| Legendary Aniipod | Crevice Exploration Shop after earning Legendary Tokens through exploration and story progress | No listed currency price | Craft it for Irisalis after collecting Legendary Tokens; it is a story-catch key, not a field pod. |
A practical split: let Aniipod, Pro, and Mega absorb routine attempts. Pack Hyper, Trace, and Tumbler for a route that calls for them. Do not carry a guarantee as if it were just the next upgrade.
Catching changes in the live game
Official updates reduced alert range and increased base catch success in high-level regions. If an old route tells you to assume every late-area catch is hostile, test the live encounter first.
The base capture multiplier for Tumbler was raised to 6× in high-density areas. That makes it a planned group tool; keep the 10-free-slot requirement in mind before throwing it.
Launch notes confirm that an Aniimo caught with Sparkling Cube has Perfect Potential. Save it for the exact target you want to keep, instead of spending it just because an encounter is rare.
Quick answers
Which Aniipod should I throw for a normal catch?
Start with Aniipod. Move to Pro or Mega only when the displayed chance needs help. The stronger pod is a response to a visible problem, not the default button.
Do Mega, Hyper, and Trace have the same catch multiplier?
Their catch multiplier is the same at 2×. Pick Mega for a straight odds increase, Hyper when range or toss speed is the problem, and Trace when a moving target needs tracking.
When is Tumbler worth using?
Tumbler earns its place in a Wild Surge or Nurture group, where it receives its 6× group-catch benefit. It is only a normal 2× option in an ordinary field catch, and the current game requires ten free Aniimo slots before it can be thrown.
What should I save Ultra and Sparkling Cube for?
Use Ultra when the individual target is too valuable to lose. Use Sparkling Cube only when you want that exact catch as a Sparkling with its Perfect Potential guarantee.